
Add a User
Add a teammate to your account, choose their role, and give them access to the workspaces they need.
Open the Users page. Select your profile picture in the top right corner, then choose Users.
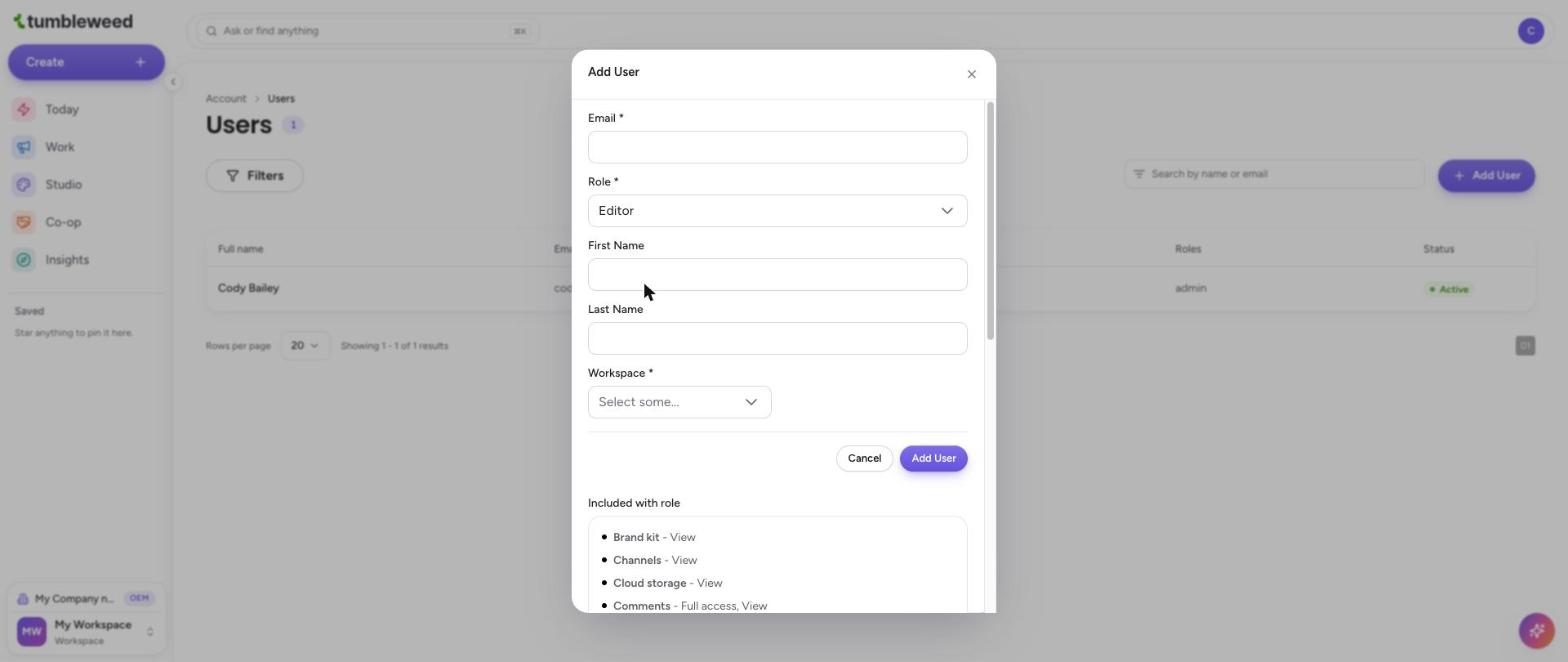
Select Add User. The button is above the table, on the right. The Add User form opens.

Enter their email address. The email address is required.
Choose a role. Pick Admin, Editor, or Contributor.

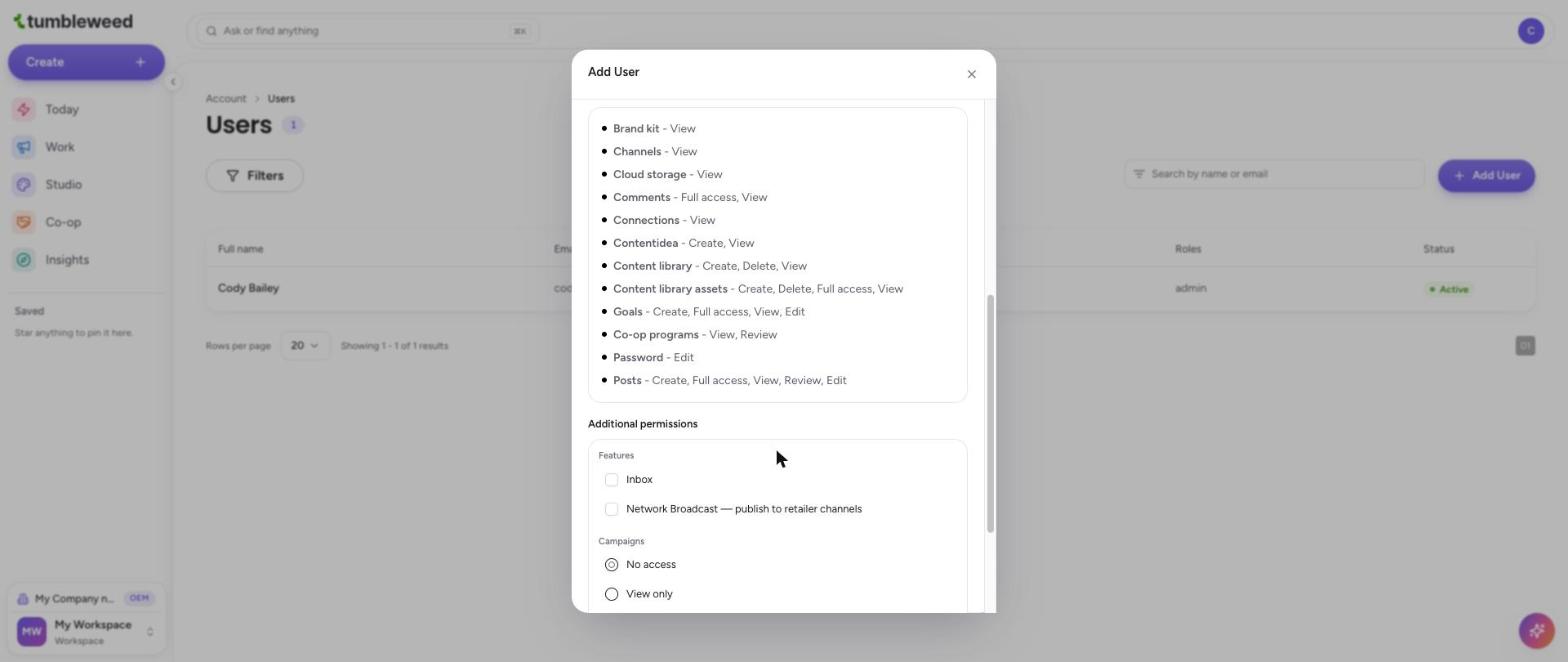
Review what the role includes. Scroll down in the form to the Included with role list. It shows what the person can see and do with that role.
Add their name (optional). Enter a first name and a last name.
Choose their workspaces. Admins have access to every workspace, so the picker is replaced with a note. For Editors and Contributors, choose one or more workspaces. A workspace is required.
Add extra permissions (optional). Under Additional permissions, turn on Inbox or Network Broadcast, and set Campaigns and Brand kit to view only or view and edit.
Select Add User to finish.
Start with the lowest role that fits. Check the Included with role list, and add Additional permissions only when the person needs them.